Blog

Painting Information, Tips, and Equipment Walkthrough.
Should I Paint My House Or Call A Professional?
As a painting company, I think you know what we are gonna suggest. But let me highlight some of the reasons why calling in professionals is most of the time the better option for taking on any painting project.
Expertise: Professionals have the necessary skills and experience to ensure high-quality results. They know the best techniques and materials for different surfaces and conditions.
Time-Efficiency: Hiring professionals saves you time. They can complete the job faster due to their expertise and team size, allowing you to focus on other tasks or responsibilities.
Equipment: Professional painters have access to high-grade equipment and tools that might be too expensive or impractical for a one-time DIY project.
Durability: Professional work often lasts longer. They know how to properly prepare surfaces and apply paint to ensure longevity, reducing the need for frequent touch-ups.
Safety: Painting, especially exteriors,...
How Do I Paint Around My Chandelier?
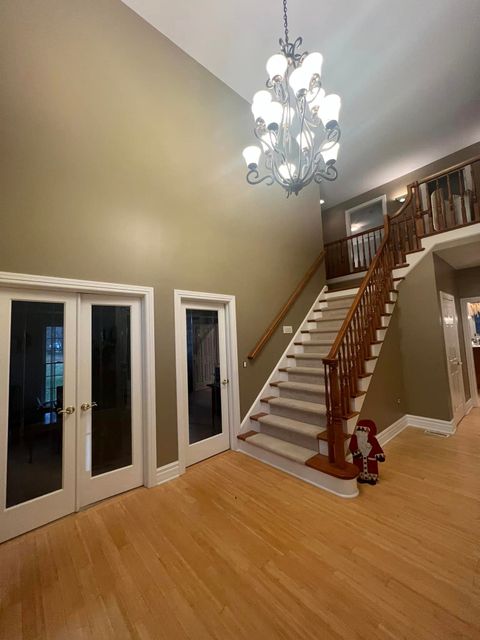
Starting a project around a chandelier can not only be a daunting task, but also dangerous. Busy Bee Painting Co. suggests you call the professionals and let us handle big tasks like this. If you still want to proceed with painting around your chandelier, here is a few tips we've picked up from our years of experience. To start, if possible tape and plastic around the chandelier to avoid getting drips on the inner portions or on the lights themselves. If not possible, use tapes to surround the base of the chandelier and proceed with small amounts of paint on your brush to trim the areas not reachable with a larger roller. Assuming your chandelier is more than 3 feet off the ground, you're gonna need a ladder. A folding ladder is best for something like this however different arrangements for your house structure may call for a different type of ladder at that point it is your best judgement to proceed. One solution for both of these scenarios is a little giant ladder which allows you to fold it into both variations. Make sure the chandelier is turned off so the plastic is not...
moreHow Do I Paint My Bathroom?
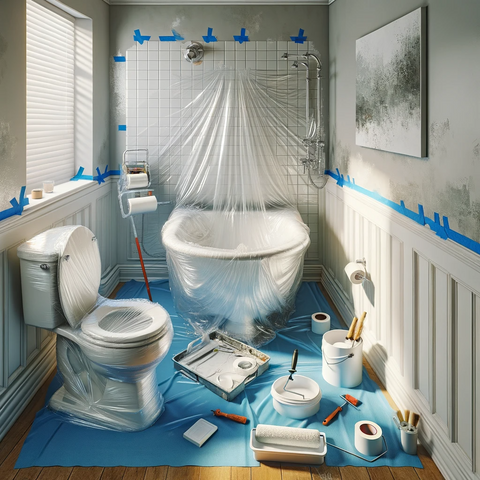
Painting your bathroom can be a daunting task. Many things come into play such as protecting amenities within the bathroom. Toilet, mirrors, bathtub, cabinets, heaters and even doors. It can be done and at Busy Bee Painting Co. We specialize in painting bathrooms with expert techniques. However, if you wanna do it yourself. You'll have to do a little bit of prep work before you can begin. It all starts with laying down plastics and shelling on the ground of your bathroom. This can be done by laying down said plastics over the important ceramics such as your toilet and bathtub. The process here can be difficult but if you are having problems a simple Youtube Search "How to prep toilet and bathtub for painting" should give you several methods on scoring and taping off plastics and proper coverings. Once prep is finished, the next step is getting your paint. Assuming you have already picked out a color and have consulted with your local paint store about specifics, getting your paint is easy. acquire your color of choice and gather said painting materials such as your brushes, cup...
moreHow Long Do Painters Take To Paint Houses?
When Busy Bee Painting Co. takes on a job we come equipped to work as quick as possible while maintaining quality of work to ensure a perfect paint job in a timely manner. Specific times depend exactly on what you want painted, if its an exterior, things may take longer. Moving ladders, hitting trim and roof portions all play a roll in how long it takes for our final minted project. Overall, if you want a timely and accurate assessment on how long a paint job would take, schedule an appointment with us today for a free consultation. There we can give you pricing and specific details such as scheduling for painting.
moreWhat is paint VOC?
Understanding paint VOC is essential for anyone embarking on a painting project. VOC stands for Volatile Organic Compounds, which are chemicals that can evaporate into the air. In paint, VOCs contribute to that distinctive paint smell, and time to dry they can also have both short-term and long-term health effects. Low VOC or zero VOC paints are formulated to have fewer of these potentially harmful chemicals, making them a healthier choice for indoor spaces. Choosing low VOC paints not only supports better indoor air quality but also reduces environmental impact. Brands like Benjamin Moore, and Sherwin-Williams offer a variety of low VOC options without compromising on color choices or quality. In essence, when it comes to paint VOC, it's about opting for paints with fewer harmful chemicals, supporting both your health and the environment, and choosing reputable brands for a quality finish.
moreWhat is the best kind of paint for cabinets?
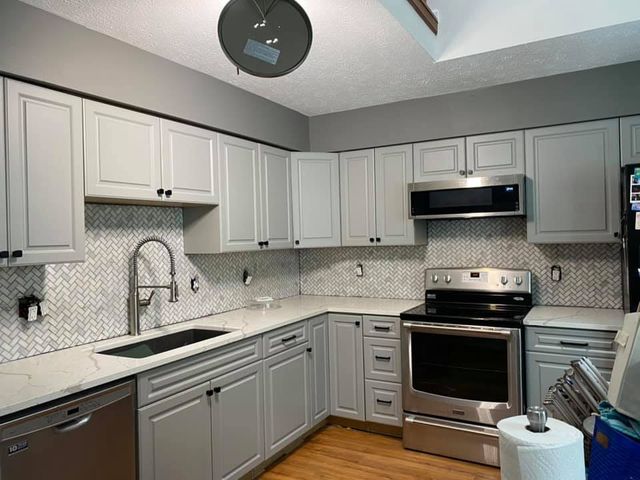
When it comes to painting cabinets, choosing the right paint is crucial for a durable and attractive finish. You want a high-quality enamel paint, either oil-based or water-based, for the best results. Oil-based paints provide a smooth, hard finish that is resistant to wear and tear, making them ideal for heavily-used areas like kitchen cabinets. On the other hand, water-based enamel paints have lower VOCs, dry faster, and are easier to clean up. Brands like Benjamin Moore Advance and Sherwin-Williams ProClassic. These popular choices known for their durability and versatility. Prep work is key, so make sure to clean and sand your cabinets before applying the paint for optimal adhesion. In summary, the best paint for cabinets is a high-quality enamel paint, either oil-based or water-based, from reputable brands like Benjamin Moore and Sherwin-Williams, with proper prep work for a lasting and appealing finish.
moreWhat are the best kind of paint brushes?
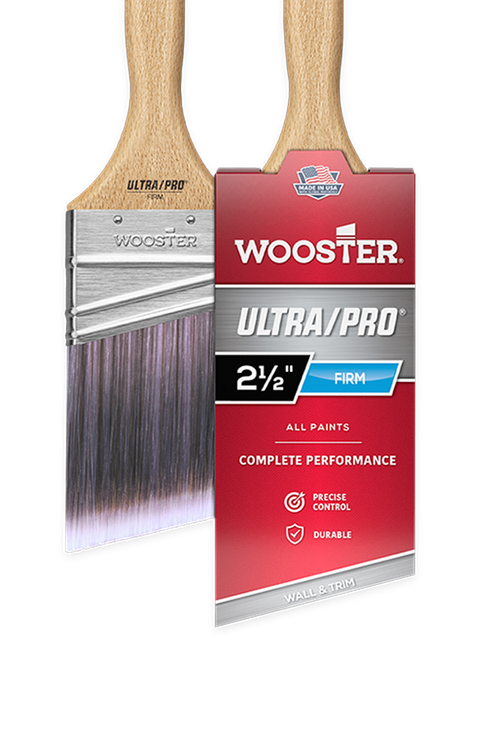
Selecting the right paintbrush is crucial for a smooth and professional painting job. For most projects, synthetic brushes are the way to go. They're durable, maintain their shape, and work well with water-based paints. If you're tackling oil-based paints, natural bristle brushes are your top choice, providing a smooth finish. Consider the type of paint you're using – flat, angled brushes for large areas, and smaller, angled brushes for detailed work. Purdy, Wooster, and Benjamin Moore are reputable brands known for their quality brushes. Invest in a variety of sizes to handle different aspects of your project. Remember, proper cleaning and storage extend the life of your brushes, ensuring they're ready for your next painting venture. In essence, when it comes to paintbrushes, go for synthetic for water-based paints, natural bristle for oil-based, consider the paint type and project size, opt for quality brands like Purdy and Wooster, and always clean and store your brushes properly for longevity.
moreHow do you protect furniture and flooring during the painting process?
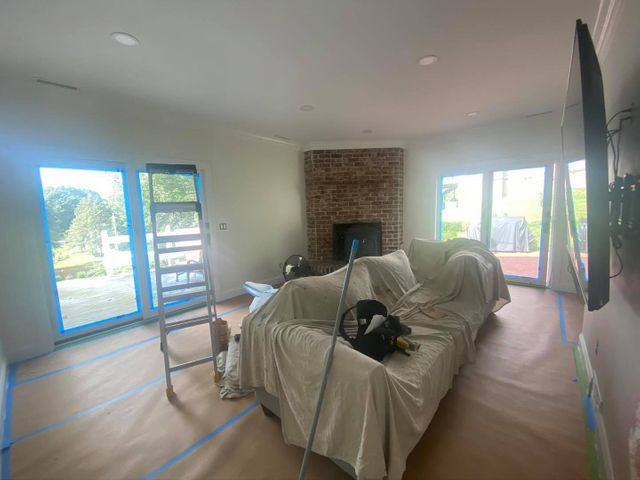
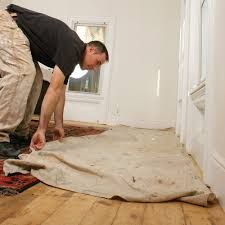
When it comes to safeguarding your furniture and flooring during the painting process, employing innovative methods is key to achieving a pristine and damage-free result. Start by investing in high-quality drop cloths made from durable materials like canvas or heavy-duty plastic. These cloths create a protective barrier against accidental spills and splatters, ensuring that your furniture remains unscathed.
Consider utilizing painter's tape strategically to cover edges and surfaces that you want to keep paint-free. This low-tack adhesive tape is designed to peel away cleanly, leaving no residue behind. It's a simple yet effective method to create clean lines and boundaries, safeguarding your furniture with precision.
Opt for reusable protective film, a cutting-edge solution that adheres directly to your furniture and flooring. This transparent film provides a barrier against paint while allowing you to monitor the painting progress beneath. Easily applied and removed, it offers a hassle-free alternative for safeguarding your valuable surfaces.
Embrace the power...
moreWhat is the best kind of paint for interior walls?
Choosing the right paint for your interior walls is crucial for achieving a flawless finish that stands the test of time. Try for water-based latex paints for their versatility, quick drying time, and easy cleanup. These paints are low in toxic fumes, making them ideal for indoor spaces. Satin and eggshell finishes strike the perfect balance, offering durability and a subtle sheen that complements various decor styles. Consider the room's purpose when selecting colors – neutral tones provide a timeless appeal, while bold hues add character. Brands like Benjamin Moore, Sherwin-Williams, and Behr consistently deliver quality, ensuring a professional-looking result. Prioritize paints with low or zero volatile organic compounds (VOCs) for a healthier indoor environment. Remember, preparation is key – clean and prime your walls before applying paint for optimal adhesion and longevity. In summary, the best paint for interior walls is water-based latex with a satin or eggshell finish, chosen based on room function, from reputable brands and with attention to low VOC options, all while...
moreEnsuring Ladder Safety:
Ensuring ladder safety is crucial to prevent accidents and injuries while working at heights. Whether you're painting, cleaning gutters, or performing other tasks, following proper ladder safety guidelines is essential. Here's a comprehensive guide to help you ensure ladder safety:
Choose the Right Ladder: Select the Appropriate Type: Use a ladder suitable for the specific task. Different ladders are designed for various purposes, such as step ladders, extension ladders, and platform ladders. Check Weight Capacity Ensure the ladder has an adequate weight capacity to support both you and your tools.
Inspect the Ladder: Before Each use Inspect the ladder for any damage, such as bent rungs, loose screws, or missing parts. Check for stability and ensure all locking mechanisms are functioning correctly.
Set Up on a Stable Surface: Place the ladder on a firm, level surface. Avoid soft or uneven ground. If using on an incline, use a ladder with adjustable legs or use a leveling accessory....
moreHow To Clean A Paint Brush:
Completing the paint job around the house was quite satisfying, and the results are impressive. Now, the only challenge is dealing with the aftermath of cleaning up those paint-covered brushes. Should you resort to soaking them in gasoline, throw them in the washing machine, consider disposal, or head back to the store for cleaners and thinners?
When it comes to cleaning a paintbrush used with latex-based paint, which is prevalent in the market, the process is more manageable. Latex paint bonds well with various surfaces, making it suitable for home or office projects. The advantage is that while the paint is still wet, it can be easily removed with a clean, damp rag. This advice primarily focuses on cleaning brushes used with regular latex-based paint rather than oil-based paints, which may require solvents or cleaners.
The initial step in effectively cleaning a brush exposed to latex-based paint is to ensure the brush remains wet with paint during its use. Never leave a wet paintbrush out to dry, as dried paint will be significantly harder to remove. When you need...
moreDeck Staining Everything There Is to Know:
Deck staining is a crucial maintenance task for preserving and enhancing the aesthetic appeal of outdoor wooden structures. Before embarking on the staining process, it's essential to choose the right type of stain for your deck. There are two main categories: water-based (latex) and oil-based stains. Water-based stains are known for their quick drying time and easy cleanup with water, while oil-based stains provide a durable, long-lasting finish but require mineral spirits for cleanup. Prior to staining, thoroughly clean the deck to remove dirt, mildew, and old finishes. Use a deck cleaner or a mixture of water and a gentle detergent, along with a stiff brush or pressure washer for more extensive cleaning.
Once the deck is clean and dry, carefully inspect the wood for any signs of damage or rot. Make necessary repairs, replacing any rotten or damaged boards. Sand the surface to smooth out imperfections and open up the wood pores, allowing better stain penetration. Before applying the stain, protect nearby plants, furniture, and surfaces by covering them with plastic or...
more5 in 1 a Painters Right Hand Tool:
A 5-in-1 tool is a versatile and multifunctional handheld tool that combines five different functions into one compact device. The specific functions may vary slightly depending on the brand and model, but here are common uses of a typical 5-in-1 tool:
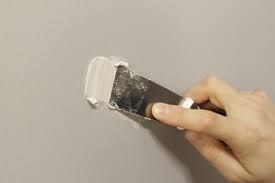
Putty Knife: One of the primary functions of a 5-in-1 tool is as a putty knife. It features a flat, wide blade that is useful for applying and smoothing putty or spackle when repairing holes, cracks, or imperfections in walls or wood surfaces.
Paint Scraper: The tool usually includes a sharp edge or scraper for removing paint, stickers, or other adhesive materials from various surfaces. It is handy for preparing surfaces before painting or refinishing.
Paint Can Opener: Many 5-in-1 tools have a small notch or opening designed to function as a paint can opener. This allows for easy opening of paint cans without damaging the lid.
Nail Puller: The hooked end of the tool is often...
Paint Preparation:
Gather Materials: To kick off your painting project, start by gathering all the necessary materials. Select the paint color and type that suits your project, and ensure you have essential tools such as a 5-in-1 tool, painter's tape, sandpaper, drop cloths, spackle, putty knife, paint trays, brushes, rollers, and a paint tray liner. Having the right tools and materials at the outset sets the stage for a well-prepared and efficient painting process.
Clear and Protect the Area: Before you begin painting, take the time to clear and protect the working area. Remove furniture and items from the room or cover them with plastic sheets. Lay down drop cloths to safeguard the floor from potential paint spills and splatters. This proactive step not only protects your belongings but also makes for a more organized and manageable workspace.
Wall Inspection and Repair: Start the preparation process by inspecting the walls for any imperfections. Use a versatile 5-in-1 tool to scrape off...
Picking The Right Sheen:
Choosing the appropriate sheen for your paint is a critical decision that influences both the aesthetic and functional aspects of your project. The sheen refers to the level of gloss or shine in the paint finish, and different sheens offer distinct benefits. When selecting the right sheen, consider factors such as the room's purpose, traffic levels, and your desired aesthetic.
Flat or Matte Sheen: Opt for a flat or matte sheen if you're aiming for a non-reflective, velvety finish. This sheen is ideal for concealing imperfections on walls and ceilings. It creates a sophisticated, subtle look, making it suitable for bedrooms, dining rooms, or formal living spaces where a muted ambiance is desired. However, keep in mind that flat finishes are less durable and may be challenging to clean.
Eggshell Sheen: For a subtle sheen that strikes a balance between matte and glossy, choose eggshell. This versatile option works well in living rooms, hallways, or bedrooms, providing a slight sheen that is easy to clean...
Lead Paint: What to Look For
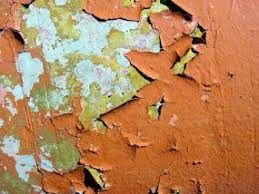
Lead paint refers to paint that contains lead as one of its components. Lead-based paints were commonly used in homes, buildings, and various structures before it became widely known that lead exposure poses serious health risks, especially to children. The use of lead in household paint was banned in the United States in 1978 due to these health concerns.
Lead is a toxic substance that, when ingested or inhaled, can cause serious health problems, particularly in developing children. Even low levels of lead exposure can lead to learning disabilities, behavioral issues, and developmental delays.
If you live in an older home or are planning renovations in a property built before 1978, it's crucial to be aware of the potential presence of lead paint. Here are some important considerations:
Lead Testing:
- Before any renovations or painting projects, it's advisable to test for lead paint. Home testing kits are available, but for more accurate results, you may want to consult with a certified lead...
Patching Perfection: A Step-by-Step Guide to Fixing Small and Medium-Sized Holes in Your Wall
Justina K.
When it comes to tackling small and medium-sized holes in your walls, a savvy approach can make a significant difference in achieving seamless repairs. Begin by assessing the extent of the damage and gather the essential tools: spackle, putty knife, sandpaper, and primer. For small holes, apply a lightweight spackle with a putty knife, ensuring a smooth and even finish. Medium-sized holes may require a slightly more robust patching compound. Feather the edges of the repair to blend seamlessly with the surrounding wall.
Sanding the patched area once it's dry is crucial for achieving a polished result. Opt for fine-grit sandpaper to smooth the surface and create an even texture. Following the sanding, apply a primer to prepare the surface for painting. This step enhances adhesion and ensures a uniform appearance once the final coat of paint is applied.
Whether you're a DIY enthusiast or a homeowner seeking professional guidance, these strategic tips will empower you to address small and medium-sized wall holes with precision and efficiency. Incorporate these steps into...
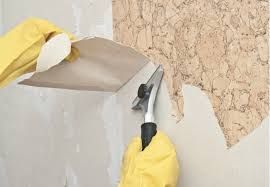
moreUnveiling the Art of Wallpaper Removal
At Busy Bee Painting, we take pride in transforming your spaces into works of art, and that journey begins with the meticulous process of wallpaper removal. With our seasoned expertise in the painting industry, we're excited to share our professional insights on mastering the art of wallpaper removal for a flawless canvas that sets the stage for stunning paint transformations.
Step 1: Precision Assessment by Busy Bee
Before we embark on the wallpaper removal journey, our Busy Bee team conducts a thorough assessment of your walls. We carefully examine the wallpaper type, adhesive, and overall condition to tailor our approach, ensuring a seamless transition to the painting phase.
Step 2: Buzzing with Precision Perforation
Armed with precision tools, Busy Bee experts delicately perforate the wallpaper, creating micro-openings that allow our specially formulated removal solutions to penetrate and loosen the adhesive. Our meticulous approach minimizes damage to the underlying surface.
...
moreMastering the Art of Caulking: A Comprehensive Guide to Proper Caulk Gun Use and Choosing the Best Caulk
Justina K.
Caulk is a versatile material commonly used in home improvement projects for sealing gaps and joints, preventing air and moisture infiltration, and providing a clean, finished look. Whether you're working on windows, doors, or various surfaces, here's a comprehensive guide on how to use caulk effectively:
Selecting the Right Caulk: Choose the appropriate type of caulk based on your project needs. There are various types, including silicone, latex, acrylic, and polyurethane caulks. Consider factors such as flexibility, durability, and compatibility with the surface.
Gathering Materials: Ensure you have all the necessary tools and materials before starting. You'll need the caulk of your choice, a caulking gun, a utility knife, painter's tape, and a rag for smoothing.
Preparing the Surface: Clean the surface thoroughly to remove dirt, dust, and old caulk. For better adhesion, use a mild detergent or rubbing alcohol. Allow the surface to dry completely before applying new...
